
Overview
Upland InterFAX’s Salesforce Faxing Lightning API allows organizations to embed faxing capabilities into their Salesforce experience, enabling the ability to both send and receive fax communications from within the Salesforce interface.
Getting Started
How to: Simple Fax Interface
The development method can vary greatly, given the flexibility of Salesforce and the Upland API. For Example, here is a quick and simple way to set up InterFAX inside of Salesforce:
You will need;
A Salesforce Account
An InterFAX Account and User
The attached reference files.
1. Log into your Salesforce account,
2. Ensure you are on “Salesforce Lightning”.
3. Navigate to the Setup area.
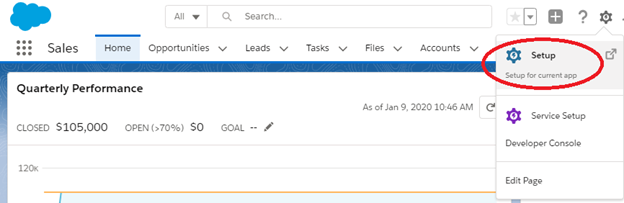
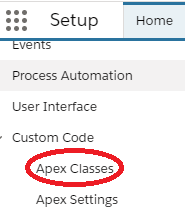
4. From the navigation on the left choose: Platform Tools > Custom Code > Apex Classes,
5. Click “New”, copy and paste in the contents of ‘InterFaxJson.txt’, and save.
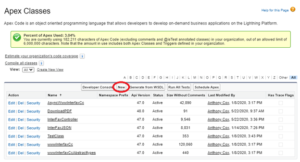
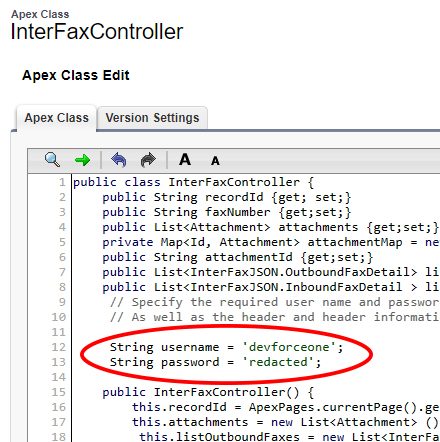
6. Click “New”, copy and paste in the contents of ‘InterFaxController.txt’, and save.
7. Edit the “InterFaxController” Class which was created, and insert your InterFAX Credentials.
8. Navigate to: Platform Tools > Custom Code > Visualforce Pages,
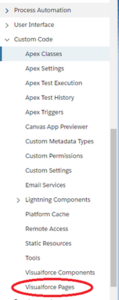
9. Click “New”, paste in the contents of UI.txt, and save (Be sure to note the name you give to the page, e.g. “InterFAX_UI” in the following steps.).

10. Now to choose which record to add our Button to (e.g. Contact), navigate to: Platform Tools > Objects and Fields > Object Manager > (Chosen Object) > Buttons, Links and Actions.
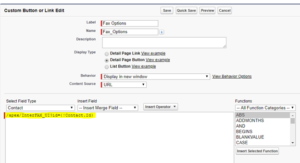
11. Click “New Button or Link”.

12. Create your Button, paying attention to the highlighted section, and using the name of the page you created earlier (e.g. “InterFAX_UI” as created in Step 9.), and click Save.
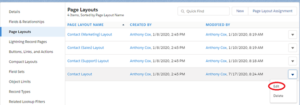
13. Under Object Manager > (Object), Page Layouts.
14. Click Edit for the desired Page.
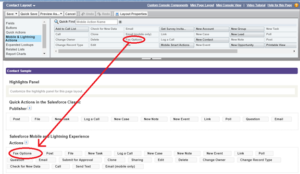
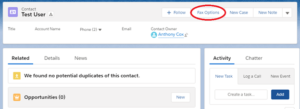
15. Under Contact Layout, select Buttons from the left-hand side, and then drag-and-drop the Button (e.g. Fax Options), created in step 12, to the appropriate section (as seen below), and save.
16. Afterwards, you should see the button you created under records associated with that object (example below).
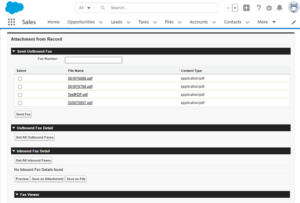
17. Once clicked, will take you to the following page that will allow you to fax attachments associated with the object.
Reference Files
You can download the following reference files – here
Package Contents:
contollerclass.png
InterFaxController.txt
InterFaxJSON.txt
UI.txt